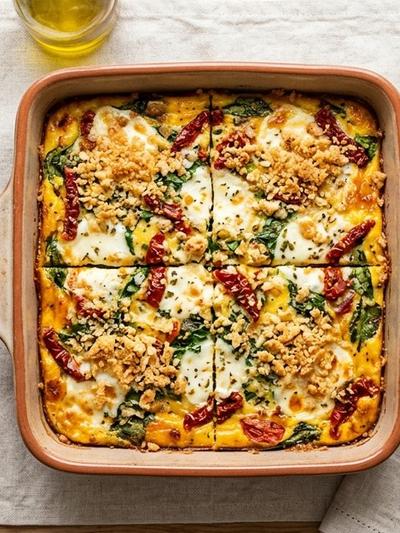
Imagine pulling a golden, bubbling slab of cheesy egg bake from the fridge, warming it for two minutes, and sitting down to a breakfast that tastes like you spent an hour in a Tuscan kitchen. This Italian mozzarella and roasted pepper breakfast bake delivers exactly that — pillowy eggs laced with cream cheese, generous pockets of melted mozzarella, sweet roasted red peppers, and a shower of parmesan across the top. Every bite has that signature Italian warmth: garlic, fresh basil, and a whisper of red pepper flakes. It is deeply satisfying, wonderfully savory, and the kind of breakfast that makes Monday mornings feel manageable.
With roughly 48 grams of fat and only 5 grams of net carbs per serving, this bake sits comfortably in ideal keto macros — over 75% of its calories come from fat. The combination of mozzarella, cream cheese, heavy cream, and parmesan creates a rich fat base, while eight eggs spread across four generous portions deliver 30 grams of protein per serving. There is no flour, no breadcrumbs, and no hidden sugars — just clean, whole-food ingredients working together to keep you in ketosis and keep you full until lunch.
The real magic here is the meal-prep angle. You bake one dish on Sunday evening, slice it into four thick squares, and stash them in the fridge. Each morning, a quick reheat in the microwave or a few minutes in a warm oven gives you a hot, restaurant-quality Italian breakfast with zero effort. The bake holds its texture beautifully for up to five days, and the flavors actually deepen as the peppers and herbs meld with the cheese overnight.
Ingredients (serves 4)
For the egg base:
- 8 large eggs
- 4 oz (113g) cream cheese, softened
- 1/3 cup (80ml) heavy whipping cream
- 1 tsp Italian seasoning (dried oregano, basil, thyme blend)
- 1/2 tsp fine sea salt
- 1/4 tsp freshly ground black pepper
- 1/4 tsp red pepper flakes (optional)
For the filling and topping:
- 8 oz (227g) whole-milk mozzarella, cut into 1/2-inch cubes
- 1 oz (28g) grated parmesan cheese
- 1/2 cup (75g) jarred roasted red peppers, well-drained and chopped
- 2 cups (60g) fresh baby spinach
- 2 tbsp (30ml) extra-virgin olive oil
- 2 cloves garlic, minced
- 8–10 fresh basil leaves, roughly torn
Instructions
Preheat and prep. Set your oven to 375°F (190°C). Grease an 8×8-inch (20×20cm) baking dish with a thin coat of olive oil or butter. Bring the cream cheese to room temperature if you have not already — this prevents lumps in the egg base.
Sauté the spinach. Heat the olive oil in a small skillet over medium heat. Add the minced garlic and cook for 30 seconds until fragrant but not browned. Toss in the baby spinach and stir for about 1 minute, just until the leaves wilt and turn bright green. Remove from heat and set aside. The spinach will continue to soften in the oven, so do not overcook it here.
Build the egg base. In a large mixing bowl, whisk together the eggs, softened cream cheese, and heavy cream. Use a fork or whisk to break up any cream cheese lumps — a few small bits are fine, as they will melt during baking and create pockets of richness. Stir in the Italian seasoning, salt, black pepper, and red pepper flakes.
Add the filling. Pat the roasted red peppers dry with a paper towel to remove excess moisture — this is important for preventing a soggy bake. Fold the peppers, wilted spinach with its garlic oil, and about two-thirds of the cubed mozzarella into the egg mixture. Stir gently until everything is evenly distributed.
Pour and top. Transfer the mixture to the prepared baking dish, using a spatula to spread it evenly. Scatter the remaining mozzarella cubes across the top, then sprinkle the grated parmesan in an even layer over everything. The parmesan will form a golden, slightly crispy crust as it bakes.
Bake. Place the dish on the center rack and bake for 35–40 minutes. The bake is done when the top is golden brown, the edges are slightly puffed, and a knife inserted in the center comes out clean. The center should be set but still have a gentle jiggle — it will firm up as it cools.
Rest and slice. Let the bake cool in the dish for at least 10 minutes before slicing. This resting period is crucial because it allows the eggs to set fully and makes slicing much cleaner. Cut into 4 equal squares. Scatter the torn fresh basil over the top just before serving or storing.
Store for the week. Once completely cooled, wrap each square individually in plastic wrap or place in separate airtight containers. Refrigerate for up to 5 days. To reheat, microwave for 60–90 seconds or warm in a 350°F (175°C) oven for 8–10 minutes until heated through.
Nutrition per Serving
| Nutrient | Amount |
|---|---|
| Calories | ~563 kcal |
| Fat | ~48g |
| Protein | ~30g |
| Total Carbs | ~5.3g |
| Fiber | ~0.5g |
| Net Carbs | ~4.8g |
Nutrition values are approximate and based on the specific ingredients and quantities listed. Your results may vary depending on brand and exact measurements.
Tips & Variations
Pat your peppers bone-dry. Jarred roasted red peppers carry a surprising amount of liquid. After draining them from the jar, spread the chopped pieces on a paper towel and press firmly with another towel on top. Excess moisture is the number-one cause of a watery egg bake, and this 30-second step prevents it entirely.
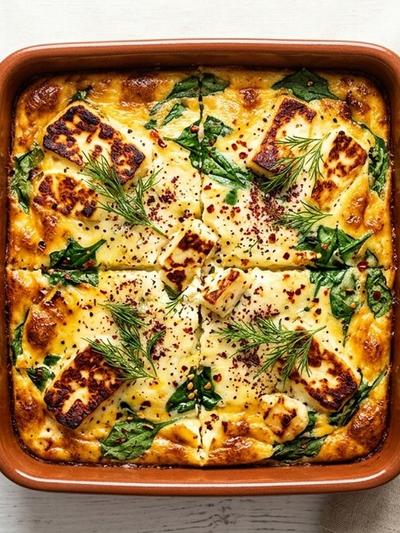
Swap the cheese for different Italian profiles. While mozzarella is the star here, you can replace half the cubed mozzarella with fontina for a nuttier, more complex melt, or use smoked mozzarella for a deeper flavor. Burrata also works beautifully — tear it over the bake during the last five minutes of cooking for a decadent finish. Always check carb counts on specialty cheeses, as some flavored varieties contain added sugars.
Watch for hidden carbs in jarred ingredients. Some brands of roasted red peppers include added sugar or high-carb thickeners. Read the label and choose peppers packed only in water and salt. The same goes for Italian seasoning blends — a few brands sneak in sugar or maltodextrin. Stick to simple herb-only blends to keep your carbs exactly where you calculated them.
Freeze individual portions for longer storage. While the fridge life is five days, you can also freeze the cooled squares for up to two months. Wrap each piece tightly in plastic wrap, then in a layer of aluminum foil. Thaw overnight in the refrigerator and reheat as usual. The texture holds up remarkably well — the high fat content from the cream cheese and mozzarella protects against freezer dryness.
Elevate with a drizzle before serving. A finishing touch transforms meal-prep breakfasts from practical to genuinely exciting. Try a drizzle of high-quality extra-virgin olive oil and a sprinkle of flaky sea salt, or spoon a teaspoon of sugar-free marinara alongside each square. A few drops of chili oil also pair beautifully with the sweet roasted peppers and salty mozzarella.